Arduino RC Controlled Lawnmower Project
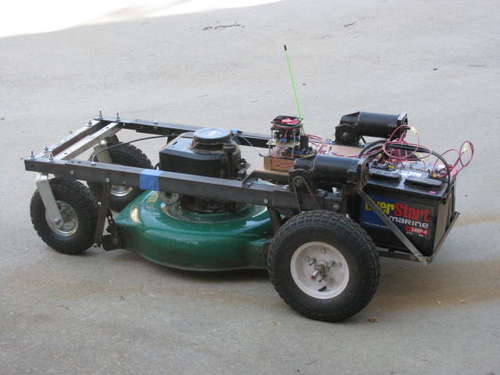
Using the guts from a push-mower, two wheelchair motors and a custom carriage, and some hand-built electronics, Instructables user Johndavid400 has created a radio-controlled lawnmower dubbed the Lawnbot4000. His detailed writeup is available here.
| Background:
Most R/C equipment comes packaged for a single specific use, which makes it easy to use but is very limited in what you can do with it. So using the Arduino as an interpreter between the R/C system and the motor driver, I can use any motor controller that I want (depending on the size of the motor and power required), reprogramming the Arduino to supply the required signals. What I ended up with: After successfully hacking a few R/C cars from the thrift store, I got bored driving them around the driveway and I was having a hard time convincing my wife that there was any usefulness in the revived toy car. So I decided it was time to make my biggest chore at home, a whole lot easier and actually put my Arduino to work, and thats how I ended up building an R/C lawnmower. While designing the lawnmower, I thought it would be cool to learn about the electronics that made it move, so I designed and built my own motor speed controller (or H-bridge) to power the lawnmower. I looked around at every H-bridge design I could find before deciding to go with a Mosfet h-bridge that uses both N-channel and P-channel Mosfets. I built several different motor driver boards for this project, the first two were on Radio-Shack perf-board and the next 4 were designed using EagleCad and etched to a piece of copper-clad PCB, using the toner-transfer method. The most recent board is the one I use to mow the lawn as it has the ability to stay cool even while operating for long periods of time (30-40 mins straight) at 10-20amps and 24vdc. FWIW, I had to burn up a lot of Mosfets to find this out. If you want to see any of my other motor controllers, go to www.rediculouslygoodlooking.com and check out the Mosfet shield.
Here is what I bought already assembled: Here is what I bought and assembled into the Lawnbot400 (as I call it): |


