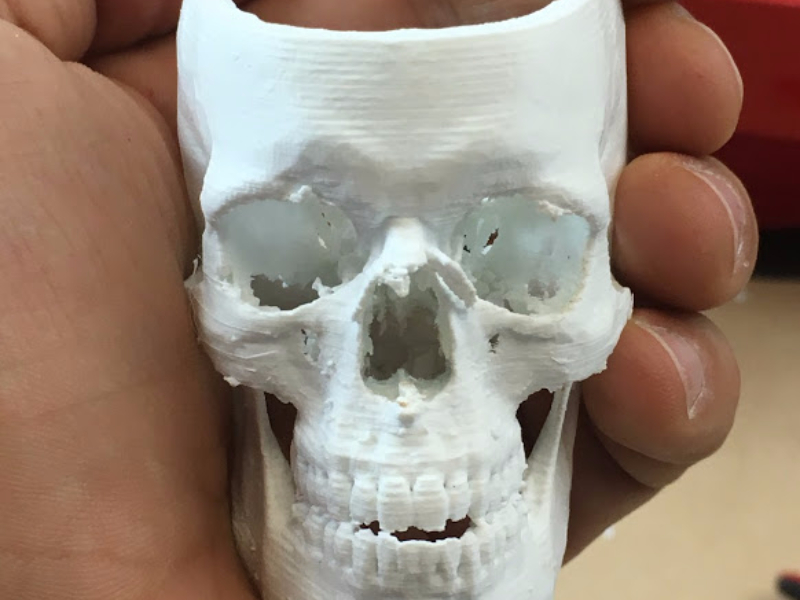
Make a Skull from your CT Scan
A few years ago I had CT scans taken of my head and upper body. A while later, I decided to see if I could obtain the files, and called the hospital. To my surprise, they were quickly agreeable and mailed me a DVD with everything on it. I was able to click through most of the images with Photoshop, but wasn’t able to do much more with the individual slices. Then I found some open-source software that let me access professional-grade features like reconstructing the slices into a 3D render and — very excitingly — letting you export those as STLs. That meant I could 3D print them!
First, get your software. I used Osirix to convert the CT scans in their native DICOM format into an STL. This is a Mac-only software tool; an alternative is to use the program 3DSlicer, which works on Mac, Windows, and Linux.
Next open the software and import your DICOM files. There may be folders for different scans (in my case, I had head scans from different angles, and a torso scan). Select the set you want to work with.
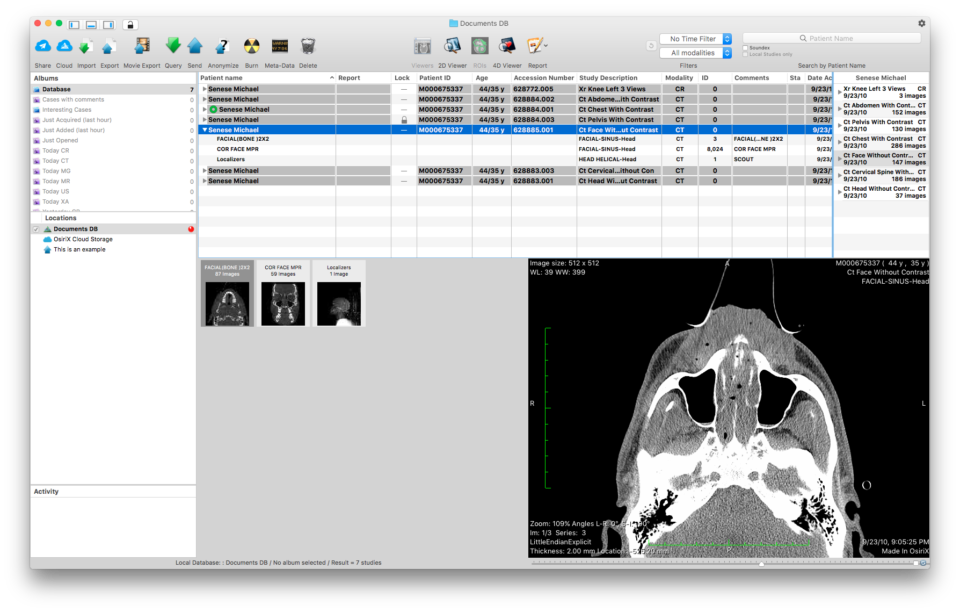
From here, it organizes the slices in order. You can slide your way through the scan to see your body from one slice to the next — it’s pretty fascinating.
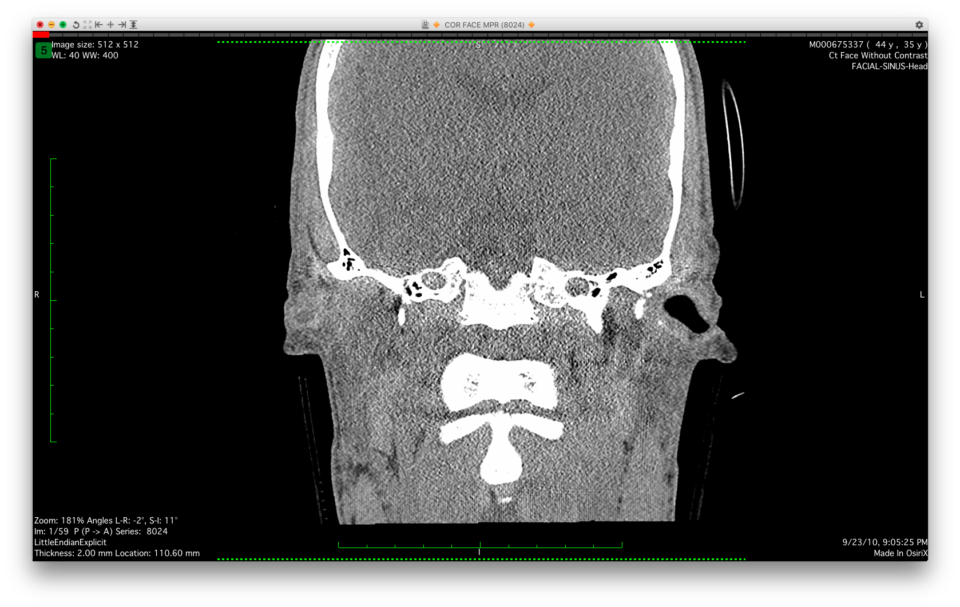
You can even export this “fly-through” view as a 2D movie file, using the menu option “Movie Export” at the top of the screen.
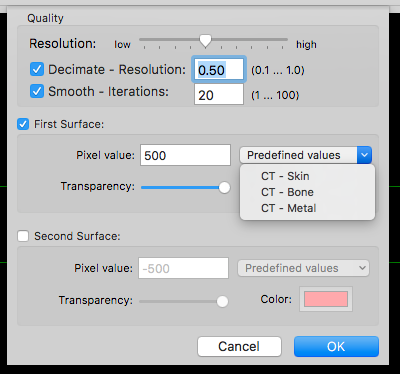
But for 3D viewing and printing, you’ll want to select the menu bar option “2D/3D” then “3D Surface Rendering.”
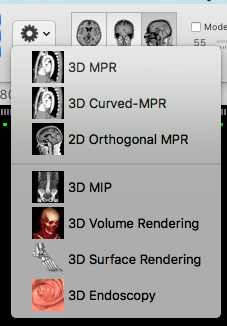
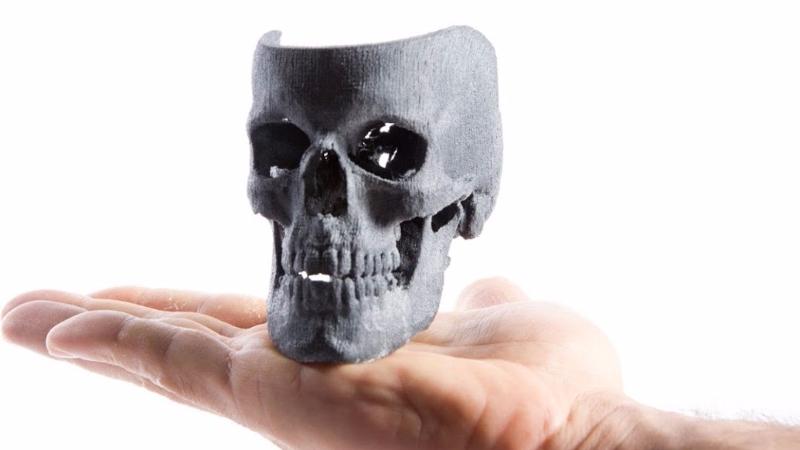
A pop-up box will offer you a lot of options. Most of these go way beyond my understanding of CT imaging, so I suggest that you play around with the rendering options to see what results you get. There are options for two materials — you can choose to isolate just bone material, or leave the skin on the scan. Or just do skin only! It’s pretty creepy and totally amazing.
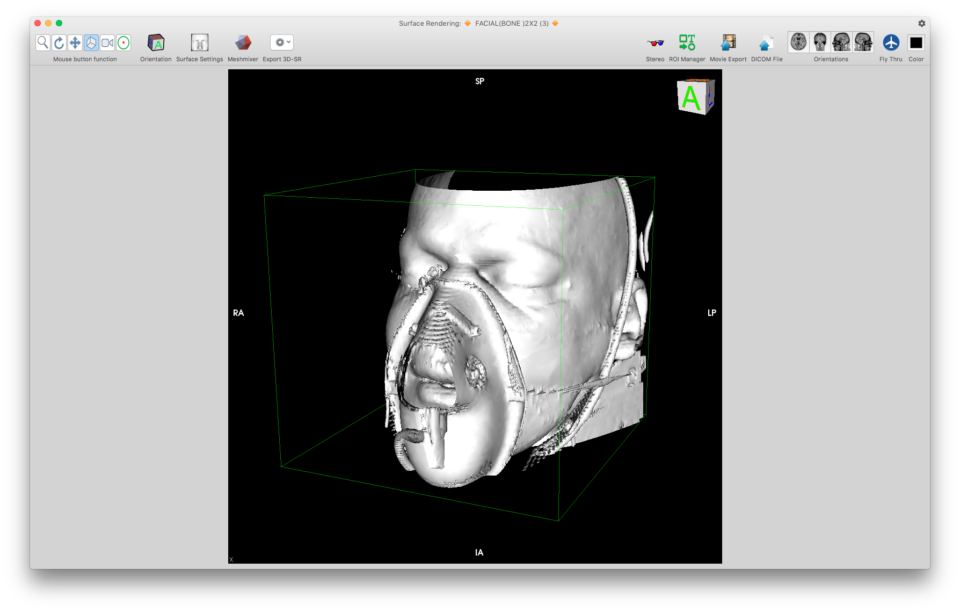
The menu options on the top of the screen here allow for you to reconfigure the render, rotate it, zoom in and out, and even create video files like the one below.
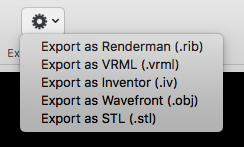
For 3D printing, however, you’ll want to use the “Export 3D-SR” option, then chose the last option “Export as STL (.stl).” That’s the file type that 3D printer software is most familiar with, and can convert into a printable file. Be warned, this will likely be a very large file.
Once set as an STL, you’re able to use a 3D printer slicing software like Cura to slice it into layers that are designed for a 3D printer to create. I’ve printed mine successfully on Ultimaker and Printrbot Play printers.
You’ll probably want to play with the settings to get something that works to your liking for this. I’ve done a lot of prints so far, each time tweaking print angles, support material, etc, to see what results I get.
If you want to download my own skull, I put the STL on thingiverse: thingiverse.com/thing:1935234
Here are more specific steps to do this yourself using 3DSlicer, from an article I coordinated on with Luis Ibanez in Volume 42 of Make: magazine: makezine.com/projects/make-42/3d-print-your-medical-scan
AHA! Moment
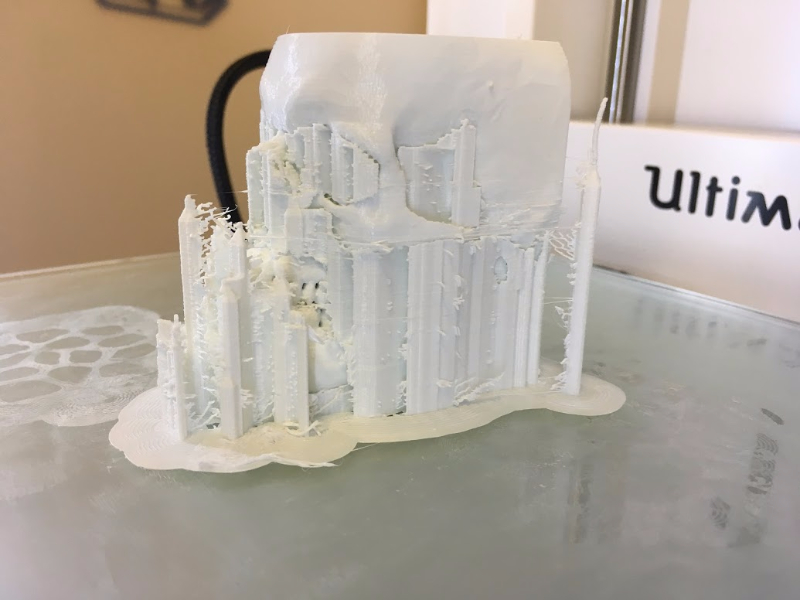
The first time I tried this print, years ago, the prints constantly failed. I had it done on an industrial machine (with a lot of cleanup). Then a few years later I re-ran it with a Cura update and had success!
UH-OH! Moment
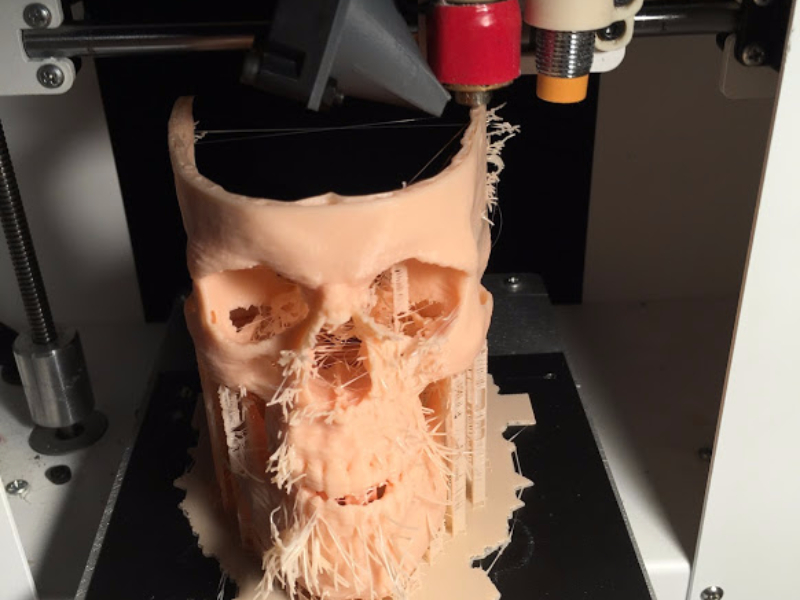
The CT scan has a lot of noise in it — there are artifacts from the oxygen mask and hoses that were on my face. The printer adds support for them, or tries to place them mid-air, resulting in whiskers. I’m working on a cleaned-up version of this using Meshmixer.
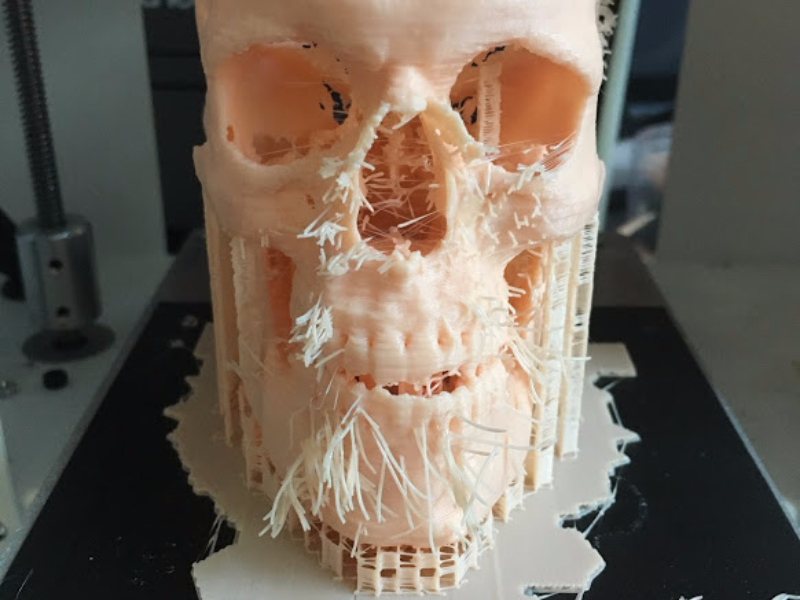
Also, there can be a lot of support extraction needed after the print finishes, depending on your settings.
If you print your own, or have any questions, ping me in the comments!

Hi, I'm Mike. I’m the executive editor of Make: magazine, and host of Discovery channel’s Punkin' Chunkin' and Catch It Keep It, TV shows where I build and explain crazy machines that crush stuff, blow things up, shoot fire, all in the name of science.
I've previously worked at Wired and ReadyMade magazines, writing about how to utilize new technology in our everyday lives.
This site is where I keep a list of instructions for fun projects I've done, am working on, or draw inspiration from. I encourage everyone to get involved — get up and do something!