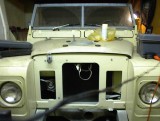
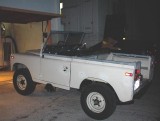
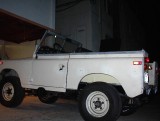
Land Rover: How to Replace the Rear Crossmember

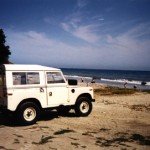
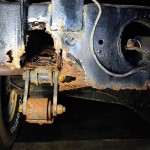
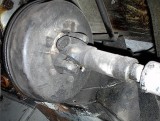
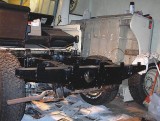
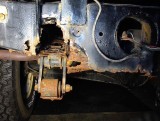
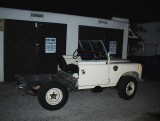
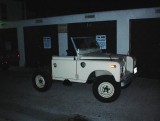
When I bought my land rover I knew that it had a rusted rear crossmember. I drove it for a year and then decided the danger was too great and it was time to fix things. The springs connected right into the rusted area and could have busted free at any time.
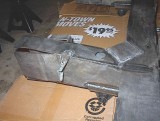
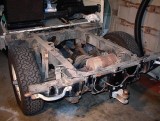
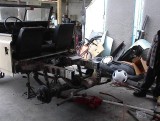
I bought a replacement crossmember with rail extensions and proceeded to dismantle the body from the frame. While replacing this section I will took some steps to curb any future rust, and addressed some other issues underneath. Here’s the notes on how I did it.
WEEK ONE
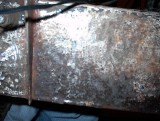
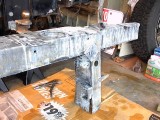
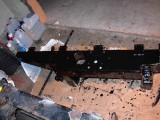
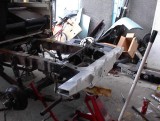
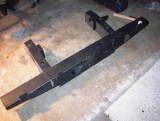
I’m repairing the rusted out section of my frame.
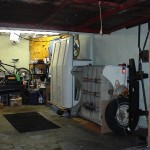
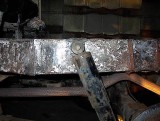
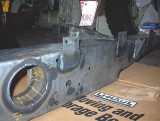
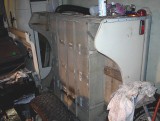
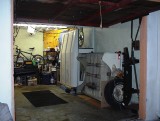
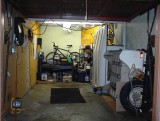
From the look of it I think the previous owner used the Land Rover for putting his boat into the lake. The rust runs up the rail a ways, but the replacement crossmember I have has extensions on it that will replace the rusted out sections. You can see it in the picture of my small garage leaning against the wall.
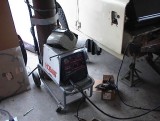
I would love to weld this together myself but I don’t have the space or resources (welding experience) to feel that this would be a good idea.
While I have the rust holes in the old crossmember giving me access to the inside of the frame, I may get a pump up sprayer with a nice long extension wand and spray the inside with POR-15. I know that there will be issues like crud and flakes getting in the way, but I feel that the benefits will outweigh not doing it at all. I am also grinding the rust and paint off the outside of the rear frame which will get a coat of POR as well.
I may also galvanize the replacement crossmember before having it welded on. Since that section is historically a problem area with rust I figure galvanizing it will keep me from having to go through this process again. When I asked the welder if he would work with galvanized steel (because of the toxic fumes) he replied “I aint scared of it.”
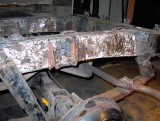
While that is being done I plan on drilling the rivets out of the underbody supports and cleaning them down to metal, which will also get a coat of POR before being reinstalled. There is a bit of reaction taking place between the aluminum tub and the steel supports so this will also help keep them isolated from each other.


WEEK TWO
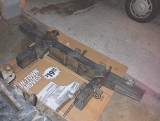
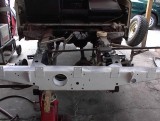
Here are a few new pictures of paint and rust removal, and the new crossmember.


WEEK THREE
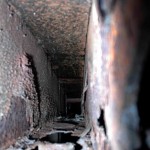
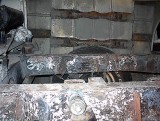
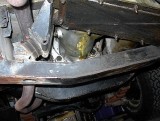
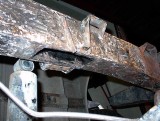
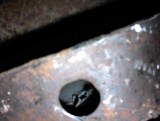
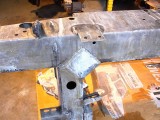
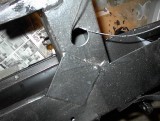
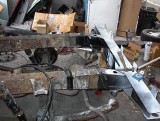
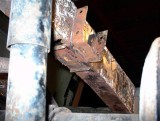
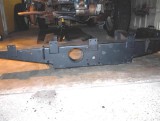
In these two pictures you can see what the rust under the left side bump stop did to the frame-ate a hole right through it! I didn’t realize the extent of it until I cut the welds to remove the securing plate. A little concerning…


The right side looks better but I will cut the plate off anyways and make sure it is all clear underneath.


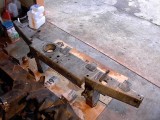
Paint and rust removal coming along.


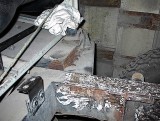
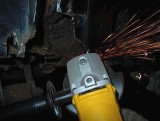
The fuel tank has a lot of surface rust on it, something I would also like to address. I think I may remove the seat box while I have it disassembled to this point and look at that as well as some of the other components underneath. I can’t grind the fuel tank, because as you can see there are many sparks. It wouldn’t be safe.


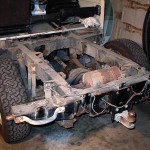
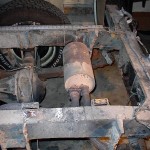
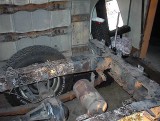
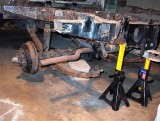
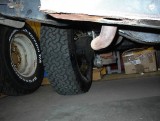
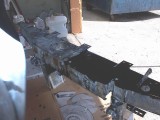
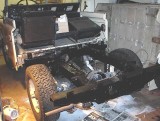
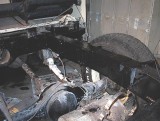
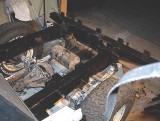
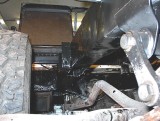
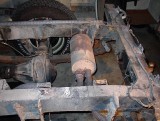
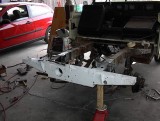
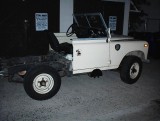
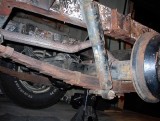
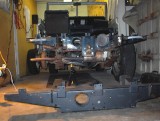
Here are a few shots of the underside of the rover.


WEEK FOUR
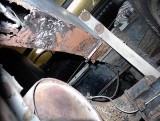
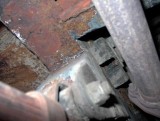
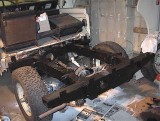
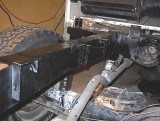
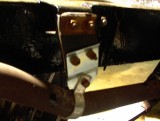
Last week I found rusted holes under the axle bump stops. In order to remedy the holes, I decided to drop the axle down and clear an opening for a replacement piece of metal to be welded. Thanks you whoever decided to put anti-thread lock on the nuts and bolts of the suspension, it couldn’t have come apart easier.

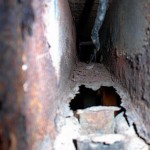
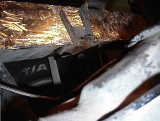
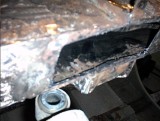
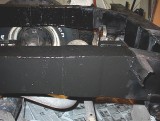
The following three photos are from the left side frame rail after I grinded the hole back to good steel.


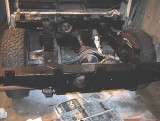
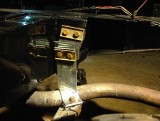
These next four photos are the right side of the frame rail, same operation. You can see the wiring loom where it passes through the rame rail. Something to be careful about while grinding in that area (a lesson i learned after knicking the brake pipe a couple of times)


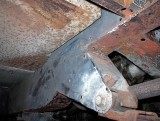
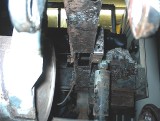
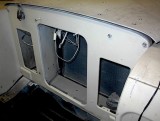
A few photos of the frame further under the cab area-I’m trying to use the flash to get some sort of idea of the condition of the inside of the crossmembers and rails in this section.


WEEK FIVE
Over the last few weeks I have been grinding the paint off of the frame and preparing to weld the new replacement crossmember on. Before I weld the new piece on, I want to do everything I can to address any rust from attacking this susceptible area in the future. I was debating between two options:
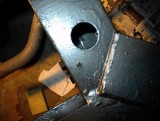
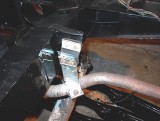
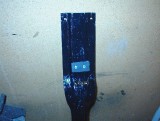
 Once the paint was stripped I used my grinder to cut the exhaust hangers off of the old frame, cleaned them up and then took the pieces to a welder closeby to have them attached. At the same time I had had the welder cut 3″x3″ angle iron and weld it to reinforce the rail/crossmember union. This is how the standard LR frames come so I felt it was necessary. In the photos above you can see the piece as it came originally, and after I stripped the paint and had the welding done.


 Once the part was ready to be painted, some prep work is required to make the POR-15 effective. First, the piece needs to be cleaned. They have a product called “Marine-Clean” which is a heavy-duty degreaser. I diluted some in a spray bottle then used a scouring sponge to get at everything. This needs to be rinsed off, then the part has to dry completely. After it has dried, an etcher is used to “key” the metal so the slick POR-15 can grab on to something. Their product is called “Metal Ready” and it also dissolves rust-supposedly you can place your old rusty tools in it and leave it overnight-they’ll be new and shiny in the morning. All of the POR-15 products require you to use heavy-duty gloves. Old clothes, a respirator and eye-mask aren’t bad ideas either.
Once the metal ready has sat for 20 minutes or so, it has to be rinsed off as well. Just a light rinse, not a soaking, because as it washes off it leaves a white, phosphate coating that inhibits flash rusting and provides a surface to paint the POR-15 onto. Again, you have to wait for it to dry entirely.


When the part is dry, you can apply the POR-15. It has a consistency similar to olive-oil and spreads very easily. They recommend two coats. This stuff can be very messy and if you get any on yourself, make sure to remove it before it dries, or you’ll wear it until your skin sheds the old cells, about 2-3 weeks I hear. I’ll let you know. I got some on my knee, from kneeling in it. It soaked through my pants. They sell a thinner product, but a rep told me that acetone actually works better, i bought some and it does a good job. Good for cleanup.
For the hard to reach places I took a sponge and attached it to the end of a broomstick with a cable-tie. I soaked some POR into it then swabbed those areas. I used this technique for the inside of the extension rails. I’m also considering spraying it through the holes to try to coat the inside of the crossmember where it is blocked off. If you spray, you need to have a respirator that will protect from organic vapors. I bought a 3M one in the paint department of Home Depot. As it stands now, I’m impressed with the gloss and hardness of the stuff, but it dries pretty tacky in a short period of time and I have some dust and crud stuck into mine. Glad it is just the frame and not the body, I’d have to be more careful.


WEEK SIX


WEEK SEVEN
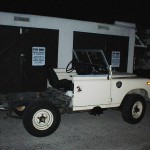
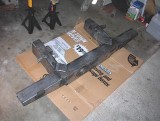
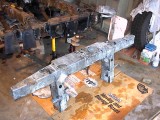
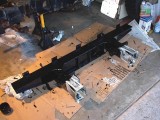
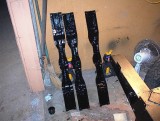
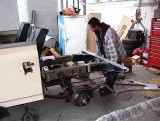
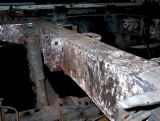
Here are photos of the frame back in my garage, with the repair. I’m painting it with POR-15 to protect it. At the same time, I’m also cleaning and painting the three support cross-members that are riveted to the bottom of the bed. You can see them leaning against the wall, the paint is drying. What a difference from when I started, isn’t it!


WEEK EIGHT
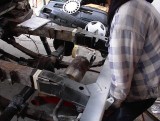
Things are starting to come together now, I’ve hung the exhaust back up with new hangers, including the middle hanger which I’ve never had before. Happy about that. The hangers don’t line up perfectly with the mounting points that I had welded to the new crossmember but isn’t that what the flexible part is for? Anyways, its on and its solid so that’s good.


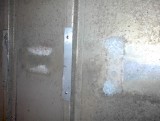
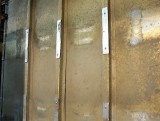
As I’m putting the pieces back together, I’m also finishing up some repair/restoration work on the bottom of the tub. I pulled off the support crossmembers off and cleaned them, then painted with POR-15. Now I’ve replaced the rubber bumber pieces with some rubber off an old tire and riveted it in place. On the body itself, some of the aluminum had deteriorated where the different metal types had reacted with each other. I took an old street sign and cut strips from it, then riveted those into place as well. They are holding solid and I’ll have the crossmembers back on tonight.


In my last trip to Home Depot I found a spraypaint that matches the color of my Land Rover’s body pretty close. Its perfect for some touchup work, and as you can see in these photos of the radiator support panel. Previously the paint had cracked and bare rusty metal was visible and looked bad. Now only if you look close you can see where the chips are. This is a temporary remedy, I plan on repainting this properly soon, but for now the metal is protected and the asthetics are restored.


Hi, I'm Mike. I’m the executive editor of Make: magazine, and host of Discovery channel’s Punkin' Chunkin' and Catch It Keep It, TV shows where I build and explain crazy machines that crush stuff, blow things up, shoot fire, all in the name of science.
I've previously worked at Wired and ReadyMade magazines, writing about how to utilize new technology in our everyday lives.
This site is where I keep a list of instructions for fun projects I've done, am working on, or draw inspiration from. I encourage everyone to get involved — get up and do something!