What is Vacuum Forming? Here’s a Quick Primer, and How to Make Your Own System
Vacuum forming is a technique used to shape plastic, that forces a thin sheet of heated plastic over (or into) a solid mold by means of a vacuum. It’s used to create a wide range of toys, models, car components, kitchen supplies, refrigerator interiors, boat hulls and more. It’s not something so common that you discuss it with your neighbors and relatives, but is actually pretty simple and achievable at home. Here are some tips on how to get started, cheap and easy.
Instructable: Make a good, cheap, upgradeable sheet plastic vacuum former
A thorough step-by-step on how to make a simple setup using your home oven, some window screen frames, a shop vacuum and a few spare supplies. Super basic but effective system.
0. (SETUP)
0.a. Support the board on something near the oven. The support(s) can be pretty much anything, or any convenient pair of things that is reasonably sturdy, allows us to route the hose to the vacuum cleaner without kinking it, and can be put very near the oven we’re using.
0.b Put some things in the oven which we can support the plastic-holding frames on. (Glasses made of actual glass, for instance.)
0.c. Preheat the oven. This usually gives us more even heat.
0.d Position some object that we want to shape plastic over on the board, over the hole, but with some spacers under it, so that air can flow from around the the object, under it, and to the hole in the board.
1. (HEAT)
1.a Clamp a sheet plastic between the pair of frames and support it on three or four things in the oven (such as glasses made of actual glass)
1.b Wait a few minutes for the plastic to get hot and rubbery and stretchable. For most plastics, we can tell how stretchable it is by how much it sags under its own weight. When it sags about the right amount, we know it’s ready.
2. (FORM)
2.a. (Turn on the vacuum cleaner, open the oven, and) QUICKLY but carefully remove the plastic from the oven with gloved hands…
2.b. …stretch the plastic down over the shape we’re copying, until the frame meets the board, creating a kind of “tent” of hot rubbery plastic over our form and stretching down to the board, and…
2.c. …let the vacuum cleaner suck air out from under the “tent,” by sucking air from under the form, and in turn from around it. This will suck the stretched, rubbery plastic inward into the desired shape, in about one second, and the plastic will cool enough to solidify in the new shape in about 10 to 20 seconds.
Studiocreations has another post with plenty of good information to run you up to speed on vacuum forming–including what type of plastics to use. This site is focused on making replica Storm Trooper armor for aspiring imperial soldiers.
I recommend you using styrene if this is your first time vacuumforming. ABS plastic does not heat up as evenly as styrene, and hot spots in the heating process can ruin a vacuumpull. Using the easier to use styrene will save you time and money in the long run if this is your first time vacuumforming.
Here’s a good post about how to make your own plastic warmer using a two-burner hot plate and disposable aluminum pans. Good for those who don’t want to melt plastics in their fancy kitchen cooking area.
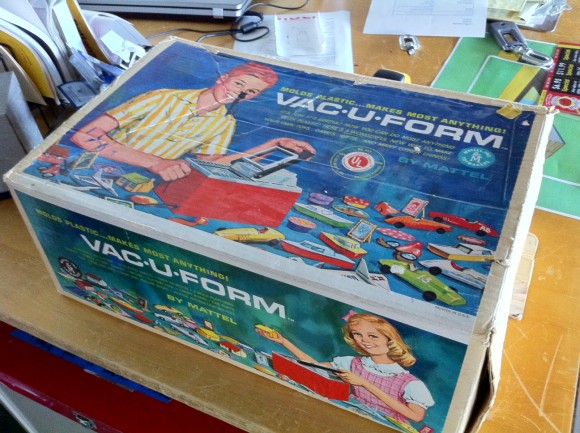
And keep your eyes open for this fantastic toy from yesteryear: Mattel’s Vac-U-Form. A full system in one, with molds to make toy cars, boats, and more. They can be find online for high prices, or at garage sales for cheap if you’re lucky.

