DIY Surfboard Rack
Growing collection of surfboards starting to clog your garage or hallway? Jeff Z solved this problem in an elegant, quick and cheap manner, with easy to find materials from your corner hardware store. Check out the full how-to and get your board collection organized!
Best of all, you can pull this off for next to nothing using stuff lying around the house/garage. However, I did spend some cash, which I’ll price out for you later on. (Had I been more diligent though, I could have cut the price down even further!) Price really depends on how many board you are building for and how deluxe you want the rack. (I went deluxe.) But look around your house and garage for materials to use, be creative. Chances are you have much of the supplies you’ll need at the ready. (This whole project could fall under the Reuse portion of the Reduce, Reuse, Recycle ethos!)
Read: How to build a vertical surf rack on the cheap

Gorgeous HD Parasailing Video Shot on Canon 7D
Gorgeous colors, beautiful movement, rich light. All from the new Canon 7D.
(The interview shots are done on the Panasonic HVX 200 – an awesome camera and something I’d love to own.)
I’ve been meaning to post about the new Canon camera for a couple months, and this parasailing video finally me to do so. The recently released Canon 7D is the current pinnacle of video-enabled digital SLR cameras. Perhaps because they’ve got a history in the video segment, and understand it better than Nikon does, Canon has made some desirable moves in video functionality on their cameras with each new release.
- The 7D finally gives video makers a range of framerates: 23.97, 29.97 50 and 60
- An impressive bitrate of 50 mbps
- Manual exposure control
- And the price is totally reasonable: just under/around $2000 (check it on Amazon)
This camera is a filmmaker’s dream. The APS-C sized sensor does tasty things with the background blur, and works great with older Canon lenses by dropping the fringy edges from the shots – something that a full frame sensor would pick up.
DIY video expert Eugenia Loli-Queru posted a great 7D entry on her blog with additional information and excitement.
Here’s another great wrap-up of 7D info, with a wish list for the next generation (autofocus being #1)
Makes me think about selling my Nikon.
Anvil Launching: How-to video
Take two anvils, a couple steel plates, a cardboard gasket, a length of fuse and a lot of black powder. Voila: anvil launching. Watch as Gay Wilkinson, champion anvil launcher, blasts his solid iron anvils 200′ in the air with this setup.
Note: Please do not take this post as a recommendation that you should attempt to launch your own anvil (or anything else, for that matter). Black powder is terrifyingly explosive – even the hardiest professionals are frightened by it.
Sunnan Synth: Solar Powered Ikea Lamp Hacked to Make a Theremin Synth
Sunnan Synth. The solar powered strobe-opto-theremin-synth-thing. Made with an Ikea Sunnan solar lamp ($20, available in-store only), photoresistors, potentiometers and a cmos 556 integrated circuit ($2). Not too pricey nor complex, and it sounds awesome.
Here’s the full writeup on how to build your own.

Homemade Pumpkin-Launching Catapult That Shoots 2000 feet – Punkin’ Chunkin’
Looking for pumpkin catapult/trebuchet plans? Check out my roundup of online trebuchet plans here.
I’m hosting the 2009 Punkin Chunkin competition alongside my Catch It Keep It pal Zach Selwyn. During the preliminary filming, we stopped to visit with “Sir Chunks A Lot” — a team hailing from southern New Jersey. I spent the day learning about their approach to the competition, growing pumpkins, and testing their rubberband-powered catapult. The rubberbands on these machines aren’t the ones you wrap your newspaper with — they’re about as thick as a 2″ piece of PVC pipe. For those test shots, the team uses bowling balls, which gives them a consistent shape and weight for each shot. I’ve never seen anything like watching a bowling ball whip through the air with so much backspin that it creates lift like a perfectly hit golfball at the driving range — on some shots, the finger holes on the ball made a whistling sound, like a whiffle ball — but it lasted for a good quarter minute or longer. Watch the speed on this thing – and it’s only at 70% power.
Every year in Delaware, a group of backyard engineers gathers with a single goal of seeing who can launch a pumpkin the furthest. The event is called Punkin Chunkin, and in the early years, the machines slowly pushed into the hundreds of feet. In short time the flying pumpkins passed the 1000′ mark, then the 2000′ mark, and are now closing in on the “holy grail” of chunkin’: one mile.
Calling these catapults “homemade” is something of a tease – sure, the machines that the participants mastermind for this event are all entirely custom built. Some of them even laugh that every year someone asks “Wow, where did you buy that?” – a testament to the years of work that goes into crafting each and every part of the machines, giving them such amazing throwing power. The event itself has become a gathering of the world’s foremost experts in the realm of catapult and trebuchet technology, and the innovations happening are pushing past anything that’s been imagined.
Watch Punkin Chunkin on the Science channel this Thanksgiving.
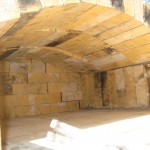
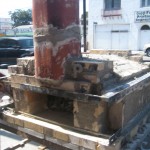
How to Build a Temporary Wood-fired Brick Pizza Oven with Cheap, Easy to Find Materials
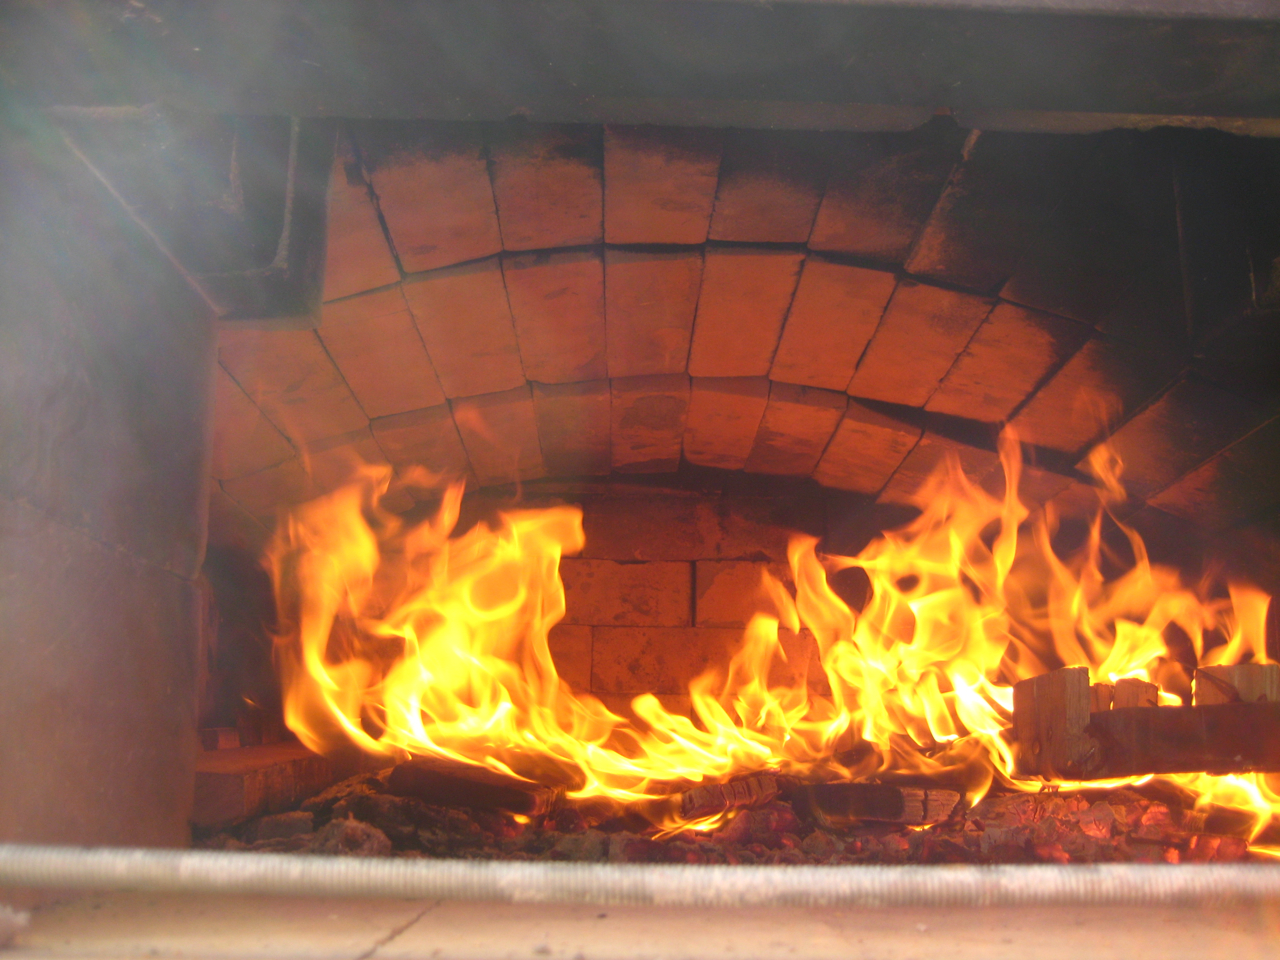
This is a great, low-cost project for someone who wants to test out the ins-and-outs of brick oven cooking. Super fast and easy to build, and with minor modifications, it can be assembled semi-permanently and get you through a season of baking delicious breads and pizzas.
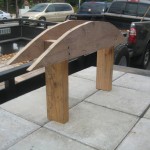
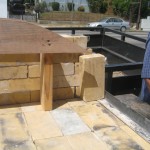
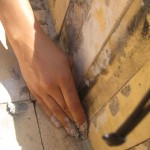
For more specifics and tips on the construction of this oven, I’ve posted details on making and using the arch jig, and a full parts list with build notes from a reader who built one from this page.
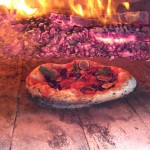
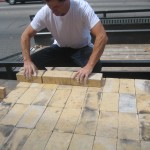
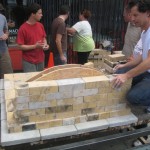
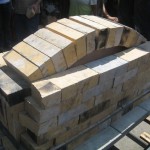
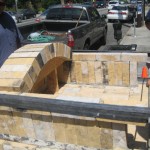
I attended a fantastic pizza making event at Machine Project (instructor: Michael O’Malley) that included the construction and firing of a DIY temporary brick pizza oven – the ultimate in pizza cooking. Hugely educational and inspiring, even for a committed pizza fanatic such as myself. The oven, built, fired up, and torn down over the course of an afternoon, worked amazingly well – I cooked the best pizza I’ve ever made, by far.
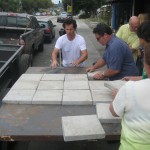
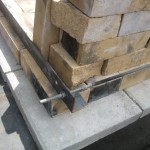
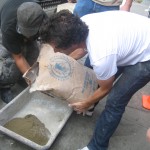
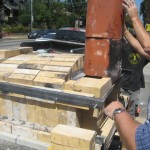
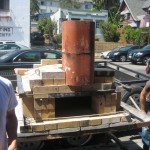
Here’s a basic rundown on how the pizza oven was assembled. Firebricks and fireclay are available at kiln and pottery supply stores. Use these over standard red bricks as the red bricks tend to pop or explode when reaching extreme temperatures. The metal table might be the most challenging/expensive component used – watch Craigslist for used welding tables. Pavers are found cheaply at Home Depot, Lowes, or gardening/hardware stores.
(Note: bricks are heavy, and brick ovens generate a lot of heat. Please use proper precautions to ensure that you don’t burn or crush yourself while making or using your oven.)


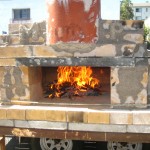
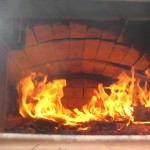
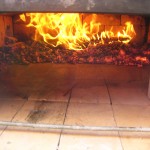
Finally, here’s a video of the oven we built in action. Enjoy!
Don’t forget, you’ll need to get a pizza peel and a decent slicer. I like to use a wood peel for preparation and inserting (dough doesn’t stick as much to wood), and a metal peel to take the pizza out. This design doesn’t need a very long handle, but larger ovens will warrant it.
The Mario Batali pizza slicer is the best slicer I’ve found. Cleaver-like satisfying heft, oversized sharp, smooth wheel and comfortable handle. It cuts through anything without dragging the pizza across the plate. I actually bring this with me to friends’ pizza parties now–it’s spoiled me.
If you have any questions, comments discoveries or discoveries, please post them in the comments.
Build Your Own Camera Gyro-Stabilizer With a Spare Hard Drive
Universal, 2 Gyro Image stabilizer – More DIY How To Projects
The most extreme camera operators use a gyro attachment for their camera to get smooth, steady shots. This applies to both still and motion (video) photography. The attachment works by two internal gyroscopes spinning in opposite directions, creating an X-Y stabilization pattern. In an rough, rocky environment (helicopters, boats, Deadliest Catch), the gyroscopic effect holds the camera steady, resulting in a much smoother shot.
You can buy camera gyros from places like Kenyon Laboratories, however such high precision results in a seriously high price tag – they can easily cost over $10k. Or, if you have a couple external hard drives laying around, plus some USB phone chargers and a few scraps of wood, you can assemble your own lightweight gyro assembly following the steps in this great Instructable.
Two things to try:
-Use 2.5″ laptop drives for size (they may not have enough mass to stabilize anything larger than the smallest pocket cameras)
-Putting the drives in-line instead of a 90º offset
How to Wax A Surfboard
 Periodically all boards need to be waxed, new and old alike. It’s pretty simple but if you haven’t done it before, this guide will get you familiar with the process.
Basecoat:
1. Take your basecoat surf wax and bring it across the board from rail to rail. Start at the tail and work your way up, slightly overlapping as you move upwards. Apply enough pressure to leave a layer of wax as you move. Read More
Convert your Honda CR-V into a Comfy, Compact Camper


The CR-V Sleepover Camper: a quick, easy conversion entailing the removal of the Honda CR-V’s backseat, assembly of hinged, spacious storage compartments, and a lid system that doubles as a platform that’s large enough to stretch out and sleep at night. Can be done in a weekend. Perfectly sized for two bouldering pads to act as a mattress that sleeps two adults. Check out the whole project with photos on Rockclimbergirl.com
The actual supplies we needed were two 4×8 sheets of 1/2 inch plywood, assorted screws, fasteners, and Dad’s garage and tools to do the construction. I saw platforms made with heavier plywood, but thought this design would be solid enough that it would be fully supported and strong enough with 1/2 inch plywood to save weight. Anything Toyota Forerunner or smaller, you’ll want to use 1/2 inch.
The author of the page credits the FJ Forums for inspiring this project. Check it out for examples of some great storage/sleep conversion done to Toyota FJ Cruisers.
Two cardboard projects: Cardboard Frisbee (easy), Cardboad Surfboard (super-challenging)
Cardboard. An awesome material, great for boxes and backing paper pads.
Also useful for more advanced projects.
Here are two how-to’s from the web: a simple frisbee, and a badass surfboard.
Cardboard Frisbee – More DIY How To Projects

CARDBOARD SURFBOARDS
or, Cross-sectional Notched Rib Assembly for Aquatic Sliding BoardsI’m building hollow, cardboard core surfboards. Cardboard, seriously. These are ridable prototypes for a new approach to building boards out of interlocking cross-sectional ribs cut from sheet materials.

Hi, I'm Mike. I’m the executive editor of Make: magazine, and host of Discovery channel’s Punkin' Chunkin' and Catch It Keep It, TV shows where I build and explain crazy machines that crush stuff, blow things up, shoot fire, all in the name of science.
I've previously worked at Wired and ReadyMade magazines, writing about how to utilize new technology in our everyday lives.
This site is where I keep a list of instructions for fun projects I've done, am working on, or draw inspiration from. I encourage everyone to get involved — get up and do something!