Levitate a Magnet Over A Home-made Superconductor
The Meisner effect is a great demonstration on one of the unique ways superconductors behave when cooled to super-cold temperatures. When placing a magnet over the supercooled superconductor, it appears to defy the laws of gravity, and floats over the surface. At this temperature, the superconductor reflects a magnetic field as a perfect mirror image, creating a repulsion of like poles. The levitating magnet is free from all friction aside from air resistance, and moves freely and smoothly. This effect has helped the creation of MagLev high-speed trains.

Want to play with superconductor levitation, but don’t have a superconductor? Make your own with just a few (quite specific) ingredients and pieces of equipment. The full set of instructions can be found here.
Equipment
To make an yttrium-barium-copper-oxide superconductor, you will need:
* Yttrium Oxide
* Barium Carbonate (TOXIC)
* Cupric Oxide
* A Laboratory Furnace or a converted pottery kiln.
* Labware made of alumina.
* An Oxygen Source
* Liquid Nitrogen and a rare-earth magnet for testing and demonstrating the superconductors
Method
There are a number of methods of producing ceramic superconductors like this, but the simplest is the so-called “shake and bake” method, which involves a four step process:
1. Mixing the chemicals;
2. Calcination(the initial firing);
3. The intermediate firing(s) (oxygen annealings);
4. The final oxygen annealing.
The number of intermediate firings and the length of the firings are largely up to the user. In general, the more intermediate firings, and the longer the duration of the firings under oxygen flow, the better the superconductor. But definite signs of superconductivity can usually be obtained without any intermediate firing at all. In fact, if the initial mixing of the chemicals is sufficiently thorough, the intermediate firing is not necessary at all.
How to Fix A Dent On Your Car: Hairdryer and A Can Of Compressed Air

Backed into a pole? Someone open their door into your car in the parking lot? Errant football throw bang your hood during a tailgate party? Now you have a dent in your brand new car. Pricey to fix, ugly to see. But before you hire an expert, try this fast and cheap solution.
You need:
– a hair dryer
– a can of compressed air
– about 5 minutes of time
Step 1. Heat the dent with the hairdryer for 3 or 4 minutes.
Step 2. Hold the can of compressed air upside down. Spray the propellant on the heated dent area.
POP, the dent snaps back into place.
As the metal heats up it expands, and when it cools down it rapidly contracts — which helps force it into the original shape.
That’s it!
Note: For this to work, the dent has to be an indentation – if the metal is creased, it won’t be able to pop out.
An interesting thing I discovered while researching this for myself — it’s hard to find compressed air sold and fulfilled directly by Amazon (aka, “Prime eligible”) — perhaps due to the laws regarding propellants. But of the ones sold via Amazon, this one was the cheapest I found, if you’re looking to try this yourself.
Here are a few videos of people using this technique successfully. Good luck.
My 1993 Mazda Rx7 had a dent in the rear Quarter Panel that was driving me nuts. 30 Seconds with the Hair dryer and some compressed air fixed the problem for 5 dollars and 2 mins of time.
Tuning A Trebuchet For Maximum Distance – A Look at the Components and Variables

Here are some notes on adjusting your trebuchet or catapult to help maximize the distance it will launch an object. Happy flingin’!
========================
Catapults and trebuchets originated more than 2000 years ago, and over time became highly sophisticated machines that represented the pinnacle of medieval engineering. The largest machines were capable of consistently launching half-ton boulders hundreds of feet, knocking down thickly fortified stone castle walls – no small feat!
The general working property of a trebuchet isn’t too complex – it’s a large lever that works by multiplying the speed on a short arm by the ratio of its length compared to the long (throwing) arm. Gravity is used to provide the energy for this, in the form of a counterweight, and a sling is attached to the end of the throwing arm to further multiply the speed of the projectile. But within those few components, you have a multitude of variables, all which interact to affect the distance a machine can hit.
Here are some good tips for tuning your trebuchet for maximum effect:
Physical Dimensions:
One of the first pieces to consider is the ratio of the short arm to the throwing arm. General wisdom has a 5:1 ratio being the norm for a standard trebuchet, although 4:1 is sometimes used. The longer the ratio, the greater the speed that tip of the throwing arm will reach – but also increasing the force required to move it quickly.
A second component is the height that the axle will be placed above the platform of the trebuchet. Larger distances allow the throwing arm to be placed higher up, which increases the distance that it will travel when released. The further it travels, the more it will accelerate, which again increases tip speed on the throwing arm.
Weight:
Obviously, there’s a connection between the counterweight and the throwing arm/projectile. General advice is that the optimal ratio is 133:1. A golf ball projectile (1.62 oz) should fire best with 13.46 lbs of counterweight – and a 14 lb bowling ball should have 1862 lbs pulling on the other side of the arm to reach maximum distance. Of course, this is all dependent on other variables and may differ for you, but is a good starting point for your machine.
The weight of the throwing arm should also be kept as low as possible, but not without damaging the integrity of it. A lightweight but strong material is advised for best results – for smaller machines ash can used, but on larger trebuchets, the strength of oak, aluminum, or even carbon fiber becomes necessary.
It is advisable to taper the throwing arm to keep it light at the tip. Meanwhile, the short arm should be stout and strong, as it has a lot of mass to support. Don’t be afraid to break it while testing – it’s good to know the limits and get as close to them as possible.

Sling:
Sling length and pin angle work together to affect the angle of release. Longer length slings have a lower angle of release, good for line drives (if you need a direct hit against the castle gate, for instance). Shorter lengths will result in a higher angle of release, best for lobbing projectiles over tall objects. The general ratio to start at is a sling length (arm connection to tip of pouch) 80% the length of the throwing arm.
Modifying the release pin angle will also affect the trajectory of the launch. Forward facing by 30º is the norm – but the length of the sling and the angle of the pin interact greatly, so make sure to change both while testing to exploring the full potential.
Wheels:
Trebuchets large and small tend to have wheels, which initially appear to be for transport. And while this would be true for minor adjustments, the largest trebuchets were so massive and heavy that they would have to be assembled on location. The real purpose of the wheels is to allow the entire mechanism to move back and forth as the counterweight is released, keeping the weight’s movement as vertically linear as possible. A weight that rotates downwards loses some of the power of gravity as the force on it has to be transferred into a forward and then backward motion. But if the counterweight drops directly downwards, it can maximize the effect of gravity.
Wind Resistance:
Not a major factor until very large builds are happening, do to the squaring effect of resistance due to wind. But for those who are working with large machines, making the moving parts (throwing arm, sling, pouch) as invisible as possible to the wind will help increase the distances.
Also, film and review your throws. A lot can be seen by checking the frames of your launches to determine what is happening, and where.
Many of these notes were taken from The Hurl, a great community of trebuchet and catapult enthusiasts. This thread on their forum details the tuning of a smaller trebuchet that was able to go from 30′ to 115′ throws with a variety of modifications. Quite an increase.
Ripcord’s trebuchet website has a tremendous amount of information on building and improving your catapult through better sling design and more. A must read.
===============
Tonight (Dec 12) I will be hosting a live discussion on the Craftsman Experience live feed with Joseph Budka, who just completed a bowling ball launching trebuchet for this show. We spent a couple days playing with the machine and will discuss the trials and tribulations of assembling one of these awesome projects (including recovering from a catastrophic malfunction). Make sure to tune into the Craftsman facebook page and click the “Experience” tab to watch. 730pm EST, 430pm PST.
Build Your Own RC Rock Crawler For Backyard Off-Road Fun – Or Just Watch Videos Of Other People Doing It

Rock crawling is a specialized hobby. Take automotive off-roading and narrow it down to just one specialize part: carefully climbing up craggy hills and over tall boulders at super-slow speeds. Sometimes done with stock trucks, but usually using highly modified vehicles with huge amounts of suspension travel and fully locking axles so all four tires receive power simultaneously.
Awesome, yes. Easy hobby to dive into? Not so much. Not only do you need a tricked-out truck, you also need a location that fits the occasion. Places like southern Utah are a mecca for this type of activity. But those in rural Nebraska have to look hard to find their crawling opportunities.
Fortunately, there’s another fun way to rock crawl, on the micro scale. A segment of the RC car community has moved away from racing their high-powered cars in tight laps at the scale equivalent of 275mph, to recreating an accurate hill-climbing, rock crawling experience at 1/12 size. The cars they use are like the trucks built for the real deal: super customized, one-of-a-kind machines that excel in their field, with gear ratios that move them at a snail’s pace. And for the owners of both full-sized and micro crawlers, the fun lies in the build process, sometimes even more so than driving the vehicle.


How to go about making your own crawler? You can buy a kit designed specifically for this. You can buy an RC truck and modify it. Or you can build the entire thing from scratch.
This Instructable gives you a great starting point to making a custom machine: building the frame. Using metal rods as the tubing and welding it together, this thing will help its tiny passengers survive a rollover from precarious heights.

A few notes to keep in mind as you start working on your project:
1. Suspension – This is the key component when it comes to building a good rc rock crawler.
Suspension articulation is what you are seeking. Independent A-arm type suspension does not provide adequate articulation for climbing over steep rocks.
You will need a rc rock crawling truck with a solid front and rear axle, with 4-link suspension.
You want your spring and shock combination to be as soft as possible to allow for maximum axle articulation.
2. Chassis – A chassis with a low center of gravity is essential.
This may be an obvious point, but moving every ounce as low as possible is going to make a huge difference when faced with a steep incline.
If your weight is too high your rc rock crawler will roll over too easily.
3. Tires – You are going to want large soft tires, with an aggressive tread pattern.
You want your tires to flatten out from the weight of the rc rock crawler, this will give you the maximum traction when rock crawling.
If your tires will not support your crawler without foam inserts, use the softest inserts that will do the job.
If your tires are too hard and need some softening you can spray them WD-40 to soften them.
The large over-sized tires are needed for ground clearance.
4. Bead-lock Rims – Using bead-lock rims make it much easier in tweaking your tires and foam inserts.
It is much easier to add or remove your foam inserts if all you have to do is unbolt the bead-locks.
If you are using rims that need to have the tires glued on, you will need to 3, 4 or 5 sets of tires glued up with different inserts or no inserts.
I find it much easier to use the same rims and change tiers or inserts.
5. Lock the differentials – This is the number one modification you need to do.
In all other types of Rcing differentials are much needed aspect, but not in a rc rock crawler. They are a detriment.
When you are working your way over a rock it is usually done one wheel at a time.
If you do not have your differentials locked, when you start over a rock the differential would send the power to the opposite wheel that is not under load.
When using a locked differential the wheel trying to get over the rock maintains constant power.
There are many different ways to lock your differentials.
You can pack them with JB Weld, modeling clay or purchase lockers.
Using locked differentials will mean that your rc crawler is successful.
6. Stock electric motors – Your rc crawler is not about speed, it is about slow calculated climbing.
You want to gear for torque. The objective is for powerful starts to get over the rocks, high RPMs will just flip your crawler over on its roof.
So, gear your rc crawler low for high torque and it will be a productive crawler.
More good DIY build info can be found here, here, and a series of links found here.
One other shared element is the videos these enthusiasts capture and post of their rides. Usually the real ones are part of a procession, like billy goats climbing a mountain in a line, with the drivers of the other vehicles stepping out to guide each other with shouts and whistles. The RC version are impressively shot, some including details that go way beyond just the trail driving.
Mercedes Unimog:
Toyota Hilux:
Range Rover Classic:
This video is hilariously bizarre, btw.
(thanks to Sizod for the video links!)
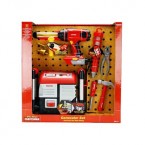
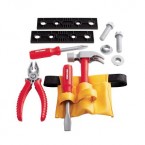
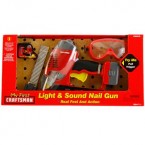
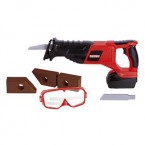
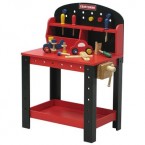
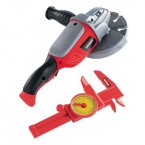
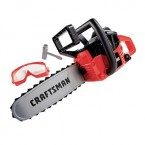
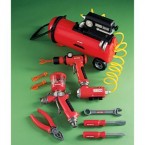
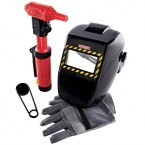
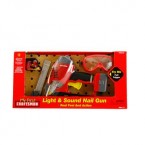
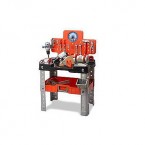
Great Kids’ Gifts: My First Craftsman Kits

It’s never too early to start your kid on a life of satisfying project making. I saw these awesome “My First Craftsman” kids’ kits at the Craftsman Experience (I’ll be there later this week for a trebuchet build) and just got home from picking up a couple of their “My First Welding Torch Kits” from my local Sears for some tots I know. (Shh!)
The Craftsman sets include some wonderfully specific tool kits: air compressor set, engine rebuild, generator and tools, and more. There are a few work benches too, but as a child I really loved the child-sized work benches my dad built me to fit next to his own work bench, so I suggest building that one and stocking it with these tools.
Oh yeah, they’re on sale right now too.


Whiskey Tricks: Proving Alcohol Content and Preserving Matter
(Quick reminder: add me on twitter and sign up for my newsletter for more cool science demos and awesome DIY projects) A few months ago I appeared in a couple episodes of How Stuff Works on Discovery channel. One of the episodes, “How Whiskey Made America,”had three segments I shot:
- Demonstrating how the term “proof” was developed by sailors who would soak gunpowder with their ration of spirits and then ignite it to prove that it hadn’t been watered down. Spirits over 57.15% alcohol content will burst into a colorful flame.
- Showing how organic material (like fruit, or more gruesomely, dead bodies), can be preserved by leaving them submerged in a high-alcohol container.
- How the early days of rocket technology initially used ethanol as a fuel, shown by demonstrating a small pulse jet engine that was filled with Everclear.
The first two parts were fast and fun, but the last part took a bit longer to shoot – the small pulse jet we were using didn’t arrive to the location until late, it took a bit of time to set things up, and we were racing the clock before having to wrap up the shoot. When I got things firing, and pulled the clamp to show the rocket propel itself on the track… nothing. It just sat there making the ungodly throbbing noise that is distinct to pulse jets. The segment was cut using stock footage instead. Bummer!  Airing at the same time, I also shot a segment for “How Summer Changed The World” where I demonstrated how the tilt of the earth’s axis helped distribute even eat around the globe, creating an environment much more conducive for life. And there are a few segments for two upcoming episodes as well. Fun stuff.
Improve Your TV Viewing With This 30-Minute Antenna Project For Free HDTV Broadcasts
I recently bit the bullet and bought a TV. Nothing extravagant, just a 28″ Hannspree LCD with enough resolution to allow it to double as a second computer monitor (and it does so nicely). But after years of using a Mac Mini, 19″ monitor, and a Netflix account, I actually have a TV that has the cable/antenna inputs and a tuner built in.
However, I’m still not ready to get a cable subscription. Even doing television shows as my job, I want to explore other options first. Netflix still reigns king in my living room, but after plugging into a dormant coaxial cable line, I discovered that I’m pulling in about 40 stations of digital HDTV Over The Air (OTA), all broadcasting with clarity that I’ve hardly seen on a screen before. It’s amazing how well Cox/TimeWarner/DirectTV etc have done at making cable/dish seem to be the only options for television viewing.
The OTA transmissions are much more advanced than the analog television I’d watch as a kid – each channel transmits a substantial amount of info that displays nicely in the upper left corner of the screen. Channel name, show name, signal strength and more. Channels are multi-cast, meaning there’s a primary transmisison and three sub-transmissions (like a dedicated NBC weather broadcast on channel 7-3). And I know I mentioned the clarity, but just in case you missed it: the clarity is shocking.
One thing I’ve noticed since my initial auto-channel scan is that a few of the channels I’m watching have come and gone, and even with the clarity, the signal strength isn’t that stellar (I’m averaging around 22%). All this got me thinking about a chat that I had with Robert Cole a few months ago in Knoxville, who had just built his own antenna setup and blogged about it. Revisiting that blog post, I’ve just found my next DIY project.
(EDIT: my antenna is now complete, and works awesome – 89 channels over the air, as shown by my autoscan)

From Robert’s writeup, here’s what’s needed to get started:
(1) 300-ohm to 75-ohm balun ($1.99 at Amazon, or get it at RadioShack or Ace)
(8) metal coat hangers
(1) 2?x4? at least a couple feet long
(1) piece of plywood
(10) washers
(10) screws
A few feet of Romex or other copper wire
Some tinfoil
The build is pretty straightforward:
- The coat hangers are cut and bent into six or eight “V” shaped pieces, with 7 inch legs.
- Any paint/coating at the center (where the bend occurs) is removed with sandpaper or a few taps of the dremel’s grinding disc.
- The bent coat hanger V’s are screwed into the 2×4, spaced evenly. Use washers to help clamp them in place.
- Copper wire is used to connect the screws in a downward zig-zag pattern, taking care to separate and insulate them where they cross over each other.
- The two lines of copper wire should terminate in the center, where the balun is connected
- If a reflector is needed (increases sensitivity but makes positioning much more important), a small piece of plywood can be covered with aluminum foil and mounted to the back side of the 2×4. Make sure the V’s are all parallel to the board, at a consistent distance.
Mount it in your attic, connect it to the coaxial cable and plug this into your TV. Voila! Strong HDTV signals, high-def TV over the air.
Here’s an outdoor version of the same design, using PVC to keep things weather-proof.
This is a popular build, and there are a lot of resources available online to build this. More information here:
- How to build a HDTV Antenna….CHEAP!
- Another antenna build how-to page
- Getting High-Definition TV Over the Air (OTA)
- HDTV Primer’s Antenna Basics
And, a handy video on making perfectly straight antenna leads from copper wire (not for coathangers)

Deal of the Day: Popular Science One-Year Subscription for $5

Popular Science is one of my favorite magazines, with great articles and columns every month (and an awesome team of editors behind the pages –– I’ve gotten to know a few of them through my magazine days and TV endeavors).
For the next week, you can get a year subscription for just $5. A great gift idea for yourself or anyone you know who likes cutting edge science info. And the nice part is no one will ever know how little it cost.
My Chevy Volt Q&A and Engineer Interview – Watch Here
EDIT: Here’s the video for those that missed it. Things begin at about the 7 minute mark.
The Chevy Volt is a very exciting car, just named both Motor Trend’s and Automobile Magazine’s 2011 Car Of The Year.
After a few years of excited anticipation, the Volt has arrived and Chevrolet is taking its new electric car on a nationwide tour to celebrate. One of the final stops on the tour is happening at the Craftsman Experience workspace in downtown Chicago on November 18th – and I will be leading a discussion with Chevy engineer Valarie Boatman about the car’s design, features, and capabilities.
You’ll be able to watch live via Craftsman’s live-streaming enabled Facebook page. Make sure to click the “Watch Live” tab on the top of the page. The event happens from 6-9pm Chicago time (4-7pm Pacfic), and the Q&A will be from about 7-8pm. Check it out!

Make Awesome Neapolitan Pizza Using the Slice Broiler-Pizza Technique

One of the challenges I’m discovering as I push deeper and deeper for pizzamaking excellence is that the tools, techniques, and time involved become more intensive and demanding with each step forward.
My pizza progression:
- Childhood pizzas were spaghetti sauce and cheese on french bread, melted in the toaster oven.
- Boboli-style pre-cooked doughs followed, topped with Contadina pizza sauce and grated mozzarella.
- A pizza stone got added to the process, helping crisp the crust in place of the dampness-inducing cookie sheet – at the expense of an increasing pre-warming time.
- Fresh dough became a thing of intrigue, supplied by bakeries on the east coast and Trader Joe’s elsewhere.
- “Pizza peel” becomes part of my vocabulary. Then a second one, this time aluminum.
- Refrigerated dough led to freshly prepared, courtesy a donated bread machine on the “dough” setting mixing up the flour, water, salt and Fleischmans.
- More control (and burnt out gears) mandate a large new Kitchen Aid.
- Wanting more flavor led to regularly feeding wild yeast and learning baker’s percentages.
- A Neapolitan pizza discovery still looming in my mind, wood-fired ovens became part of the experiment, requiring specific types of fuel and lengthy heating times, not to mention an expanding tool kit.
It’s a fun journey, one that continues to challenge and evade, but supplying continuously satisfying results as I keep pushing down the trail. With almost all parts of my pizza process now requiring a considerable amount of hand-crafted attention, I’m actually making pizza less frequently than in earlier days. So the introduction of a time-saving technique that gives results that are almost on par with what I get from a full pizza-making event is a wonderful find that can let me enjoy and share pizza on a smaller, faster scale, when those moments arise.

Hi, I'm Mike. I’m the executive editor of Make: magazine, and host of Discovery channel’s Punkin' Chunkin' and Catch It Keep It, TV shows where I build and explain crazy machines that crush stuff, blow things up, shoot fire, all in the name of science.
I've previously worked at Wired and ReadyMade magazines, writing about how to utilize new technology in our everyday lives.
This site is where I keep a list of instructions for fun projects I've done, am working on, or draw inspiration from. I encourage everyone to get involved — get up and do something!